Directions to Make Your Own Amethyst Necklace, Earrings, and Bracelet

Amethyst Gemstones have a translucence and pattern or matrix that makes them so interesting and fun to work with. They have been a gemstone I frequently use in my jewelry designs over the years in something as simple as amethyst drop earrings or as texturally complex as the bracelet in this set of jewelry.
This set of jewelry was shown in Jewelry Affair magazine in their Summer 2016 edition and I have written directions for you to make your own in whatever color theme you choose. The key is to try and find a mix of the same or similar colors in whatever type of bead you like and limit the number of other additional colors so the design flows. The following list of beads is what I put into my necklace, earrings, and bracelet, but you can make up your own list of beads that you want in your design. I've also included where I get my supplies for your convenience!
The key to this bracelet design is to work with a limited palet of colors or with shades of the same color or theme with a few accents that are repeated throughout the design. The Amethyst stones are surrounded by a support cast of other purple and amethyst beads, gemstones, and fabulous lampwork glass!
SUPPLIES FOR NECKLACE, EARRINGS & BRACELET
Amethyst Gemstones, (ArtBeads.com, FireandMountain.com, ShipwreckBeads.com
-Drops, 3, 30mm long
-Nugget, 1, 20mm
-Beads, 3, 8mm
-Rough Nuggets, 4, 10-12mm
-Nuggets, 3, 5mm
-Beads, 25, 3mm
Jasper, 15, 5mm Nuggets
Glass Flat 20mm, (ArtBeads.com, LimaBeads, Shipwreckbeads.com)
Glass Beads, 12, 5mm
Glass Beads 4, 15mm
Lampwork Glass, 9 one kind, 3 another, 1 different, (Etsy Artisans like Silverfish Designs or Inspire Glass)
Lampwork Glass, 6, 10 x 5mm
Earwires, (ArtBeads.com, ShipwreckBeads.com)
Black Annealed Steel Wire, 24 gauge, 7 yards, (Ace's Hardware,) or wire of your choice. Just make sure it goes thorugh the gemstones and beads. Gemstones tend to have narrower holes that glass beads.
Leather Cord, 30 inches using a color that works with your design, (Beadshop.com)
Silk Ribbon, 6 inches
Hook Closures, 2 Hooks & 1 Eye, (Shipwreckbeads.com)
Decorative Crimps, 2, 8-10mm. Suitable for crimping leather.(Shipwreckbeads.com)
Jump Ring, 4mm, (ShipwreckBeads.com)
Microcrystalline Wax- Renesance Wax, (Forgeron.etsy.com)
Clean Rag, small soft piece of old t shirt works really well
Steel Wire Cutters. Please do not use your good wire cutters as the steel will ruin them. (ShipwreckBeads.com)
Needle, Flat, & Hook Nose Jewelry Pliers, (Shipwreckbeads.com)
Silicone Covered Pliers, (Shipwreckbeads.com)
Bead Board or Bead Surface so the beads don't roll around, (Shipwreckbeads.com)
.JPG)
Earrings & Pendant Necklace
Each Earring and Pendant Necklace takes 36 inches of black annealed steel wire. (You may need less wire if your beads that you stack on top of each other are shorter and/or you wrap the wire around fewer times. Also you can use any wire you enjoy working with. I use a lot of the black annealed steel wire, especially with darker toned beads.)
Thread 18 inches of wire through the Amethyst drop & fold half the wire to the back of the Amethyst drop. (These Amethyst drops have a hole that goes from top to bottom.)
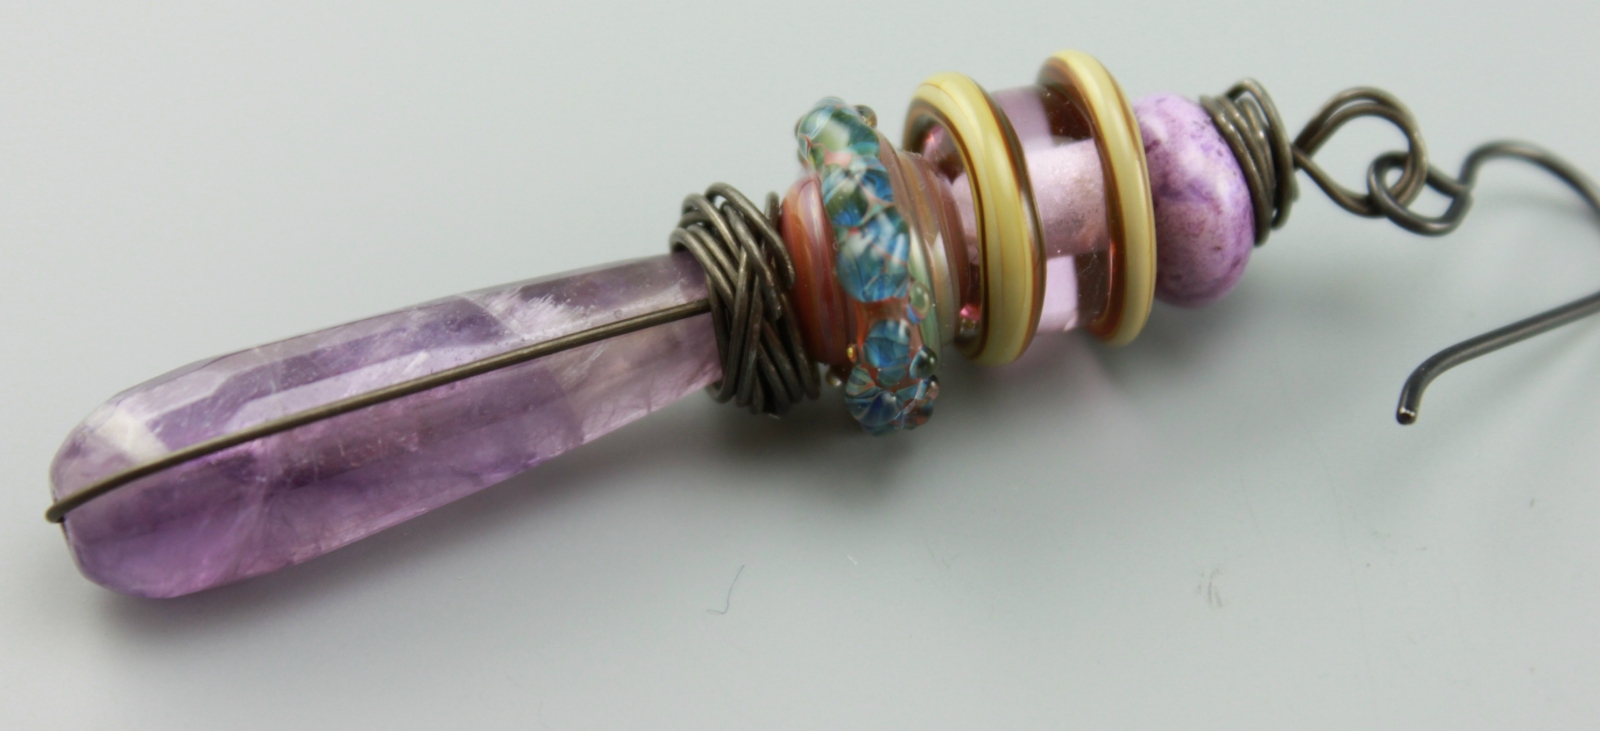
**The above photo shows the wire coming up the back side of the stone. It also shows the decoratively wrapped wire at the top of the Amethyst drop and just below the stack of lampwork glass.
Using pliers bend the wire so it is parallel to the wire that went through the Amethyst drop. Then string the two different lampwork glass beads and 5mm Jasper stone.
Above the Jasper stone, at the top of the earring design, with both wires held together, make a wrapped loop around your needle nose pliers. Hold the loop with flat nose pliers and wrap the left-over wire around the base of the loop holding the loop in place. Trim the excess wire and tuck under wire ends. File any rough ends if necessary.
Use both lengths of 8-10 inches of remaining wire to wrap one way then the other way around the top of the faceted Amethyst gemstone. (This is more of a design choice rather than one of structure for the gemstone and is shown in the above close up photo.) Trim excess and tuck under the ends. File rough ends if necessary. Attach earwire of your choice at the top of the earring design and now make the second one to match the first one.
.JPG)
Pendant
The pendant for the necklace is made just like an earring except for the addition of a 3rd different lampwork glass bead. In this case I used a flat lampwork disc in a similar color.
Cut 23 inches of leather cord or the amount you need to create the length you want the necklace to hang.
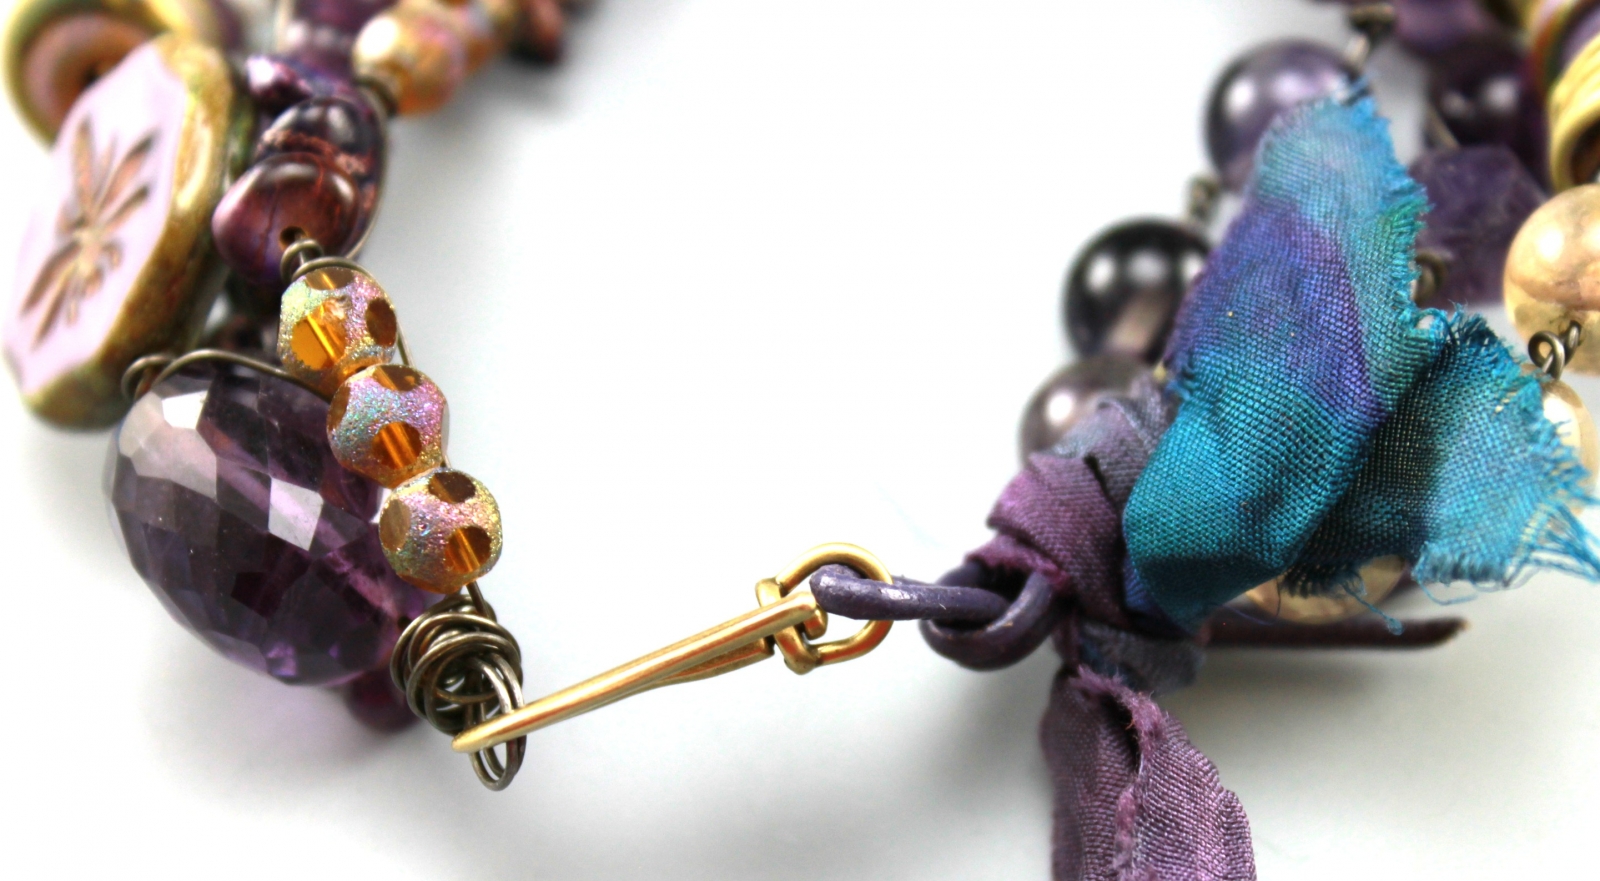
Fold 1 inch of the cord back on itself positioning the hook closure in the bend of the leather. Slide the crimp over the long and short ends of the cord positioning the crimp so ¼ inch of the cord hangs out. (Make sure the Hook is in the loop made from the leather cord before you slide the decorative crimp on and smash the crimp really good between the silicone pliers.)
**The photo below shows the cord folded back on itself and the decorative yet sturdy crimp flattened over the cord. (The cord does not pull out after I flattened it with silicone covered pliers so as not to mar the surface of the metal.)
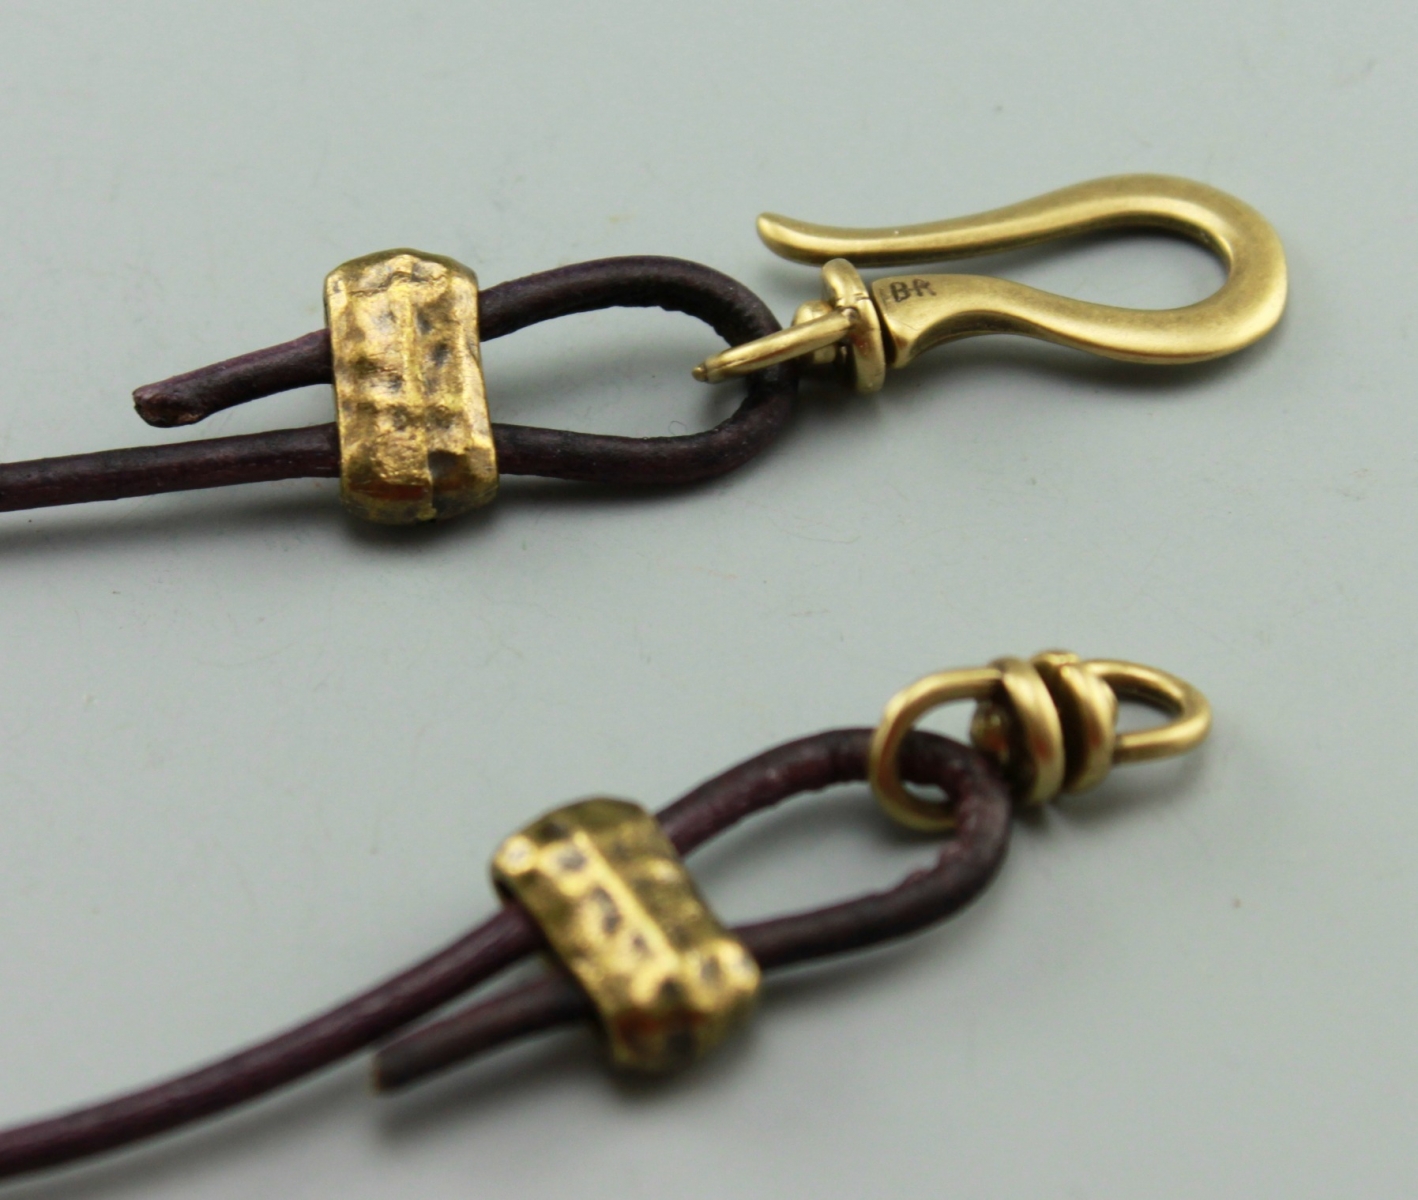
Position your silicone covered pliers over the crimp and press hard on both sides.
Repeat with eye part of the closure on the other side of the cord.
Attach jump ring to the leather and to the pendant’s loop.

Bracelet
In general, beads in groups of 3 create good visual impact in this design of braided beads. (When using just groups of two beads people starting counting the beads rather than enjoying the design.)
For example: two lengths of three beads next to another strand of three bigger beads will have bigger visual impact and suppoort the design.
Place your beads on a bead board in a pattern that works for you.
Cut three 36 inch lengths of wire and fold the three lengths in half around the larger part of your needle nose pliers until you make a complete loop for your hook closure to attach to. (Imagine you are making the loop at the top of your earrings using the same equipment and you are Then wrapping 4 of the loose ends of the wire around the base of the loop and the last two sets of wire.)
Divide the 6 wires into 3 groups of two wires each. One of the strands is the stringing wire and the other strand is the wrapping wire to hold beads in place and create structure. Start by stringimg one row of 3 beads from your bead board design. Then take your wrapping wire and pull or position it over the three beads and wrap that wire around the stringing wire a couple of times. Repeat this method with the rest of your beads to the end. Or another way to look at it is: Wrap your loose wire around the base of the 3rd bead then string on another group of 3 beads. Wrap the wire a couple of times after what is now the 6th bead.
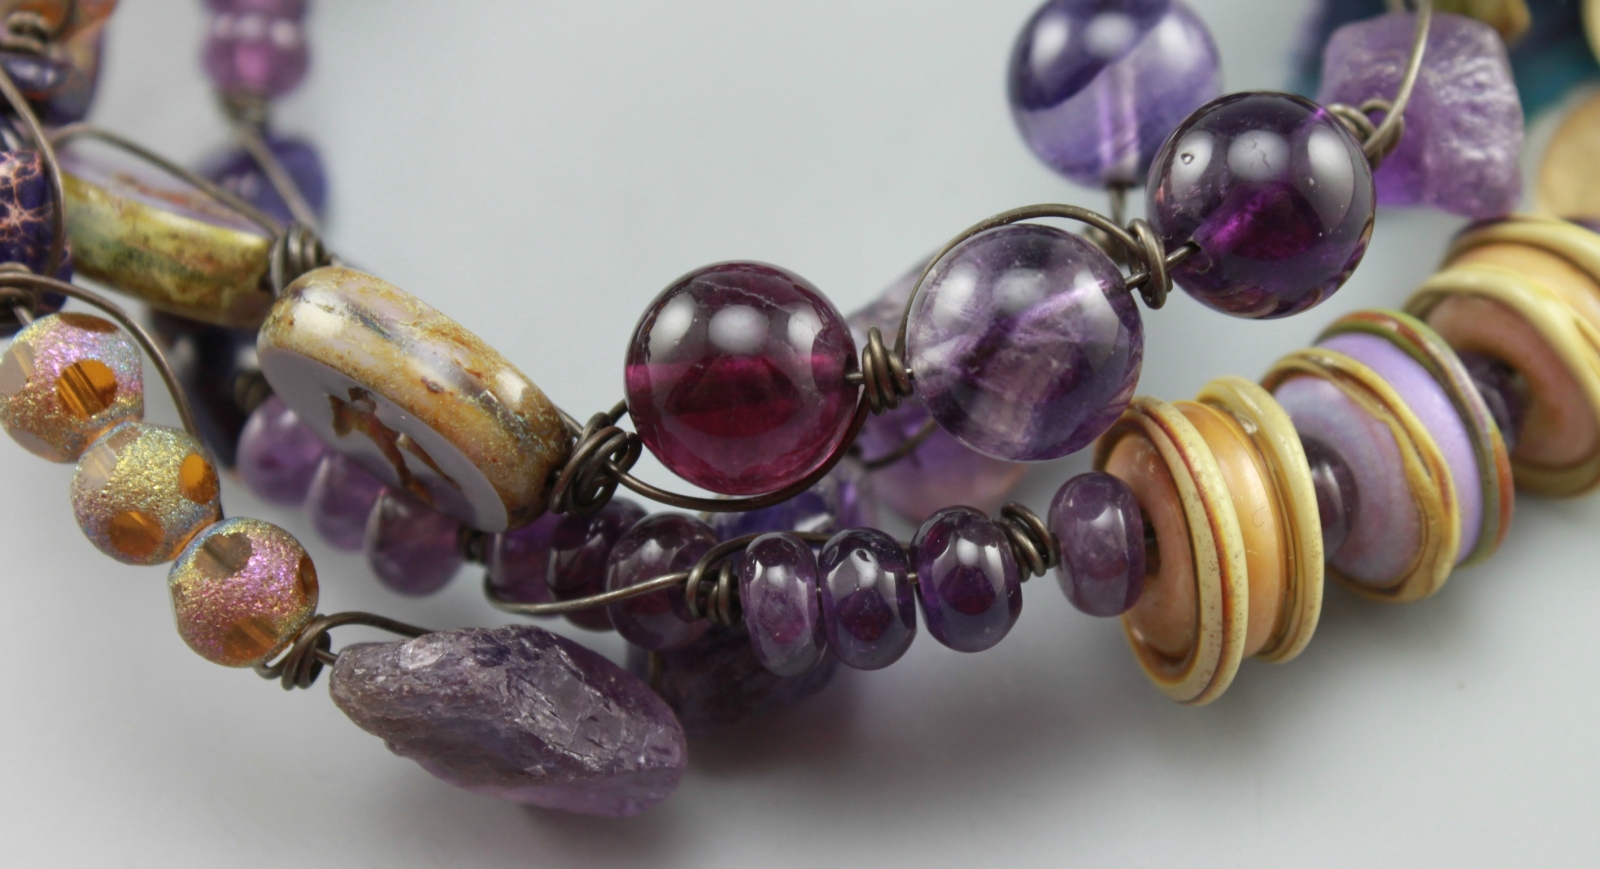
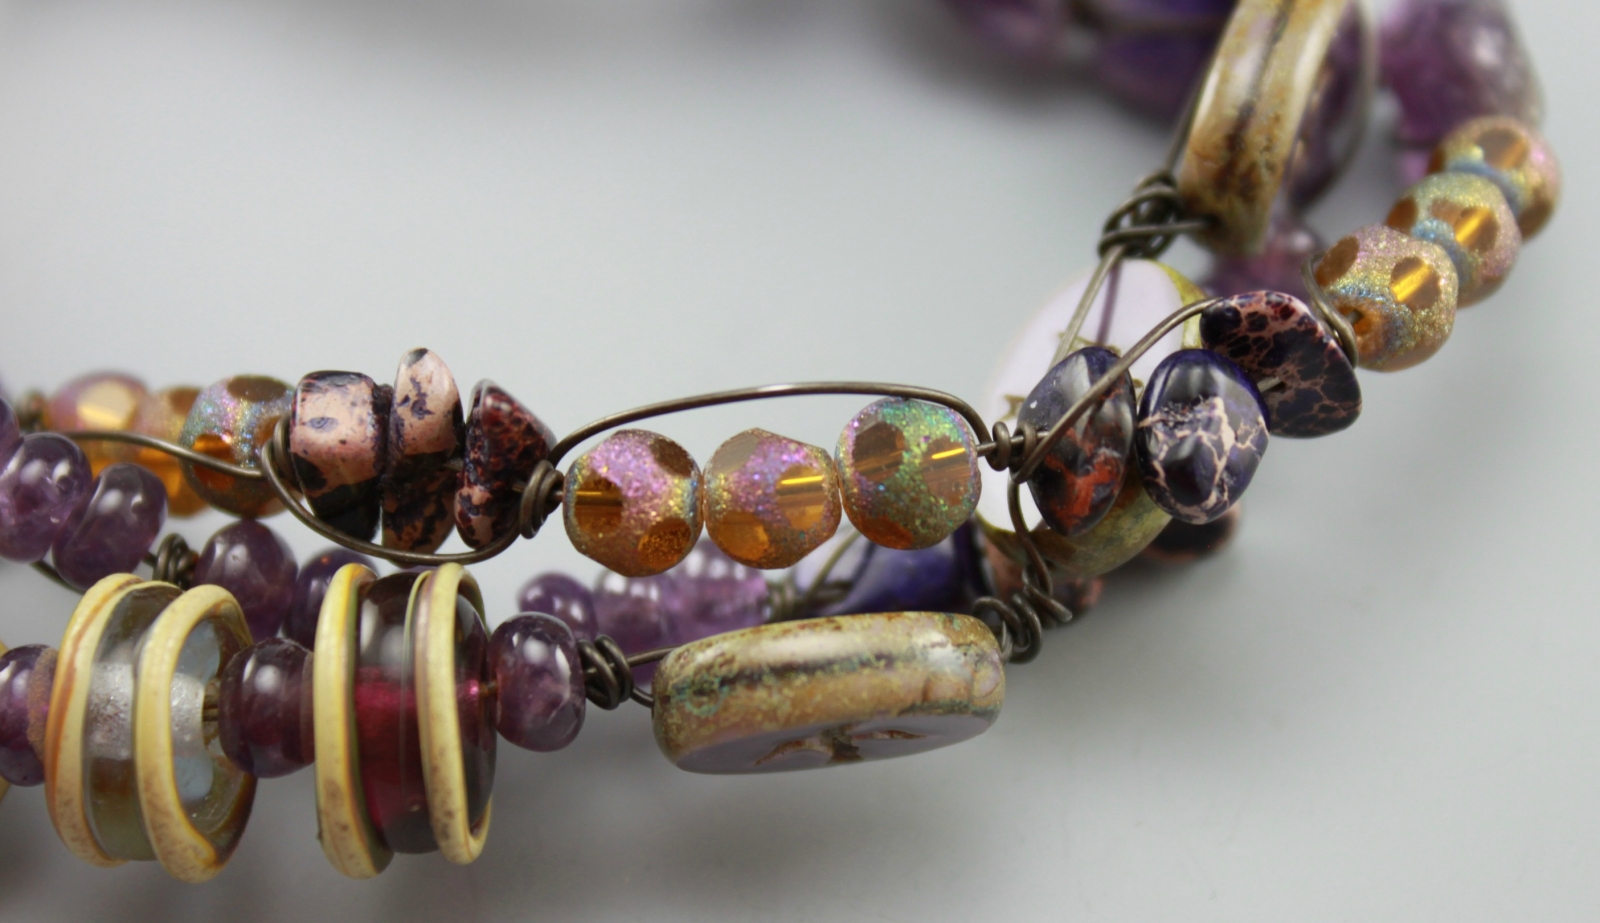
**The above two photos show how I wrapped the black annealed steel wire around the groups of 3 beads.
Repeat until you have the necessary bracelet length.
Repeat the above on each of the other two sets of wire. Apply tape folded back on itself or metal bead clamps to the end of each wire to keep the beads in place.
Then braid the beaded wires creating width and dimensions. (This is pretty much like brading hair or an embroidery thread bracelet.)
At the end and with all 6 wires make a wrapped loop at the end of the beaded braded wires. Cut off excess wire and turn under the ends so they don't snag clothing.
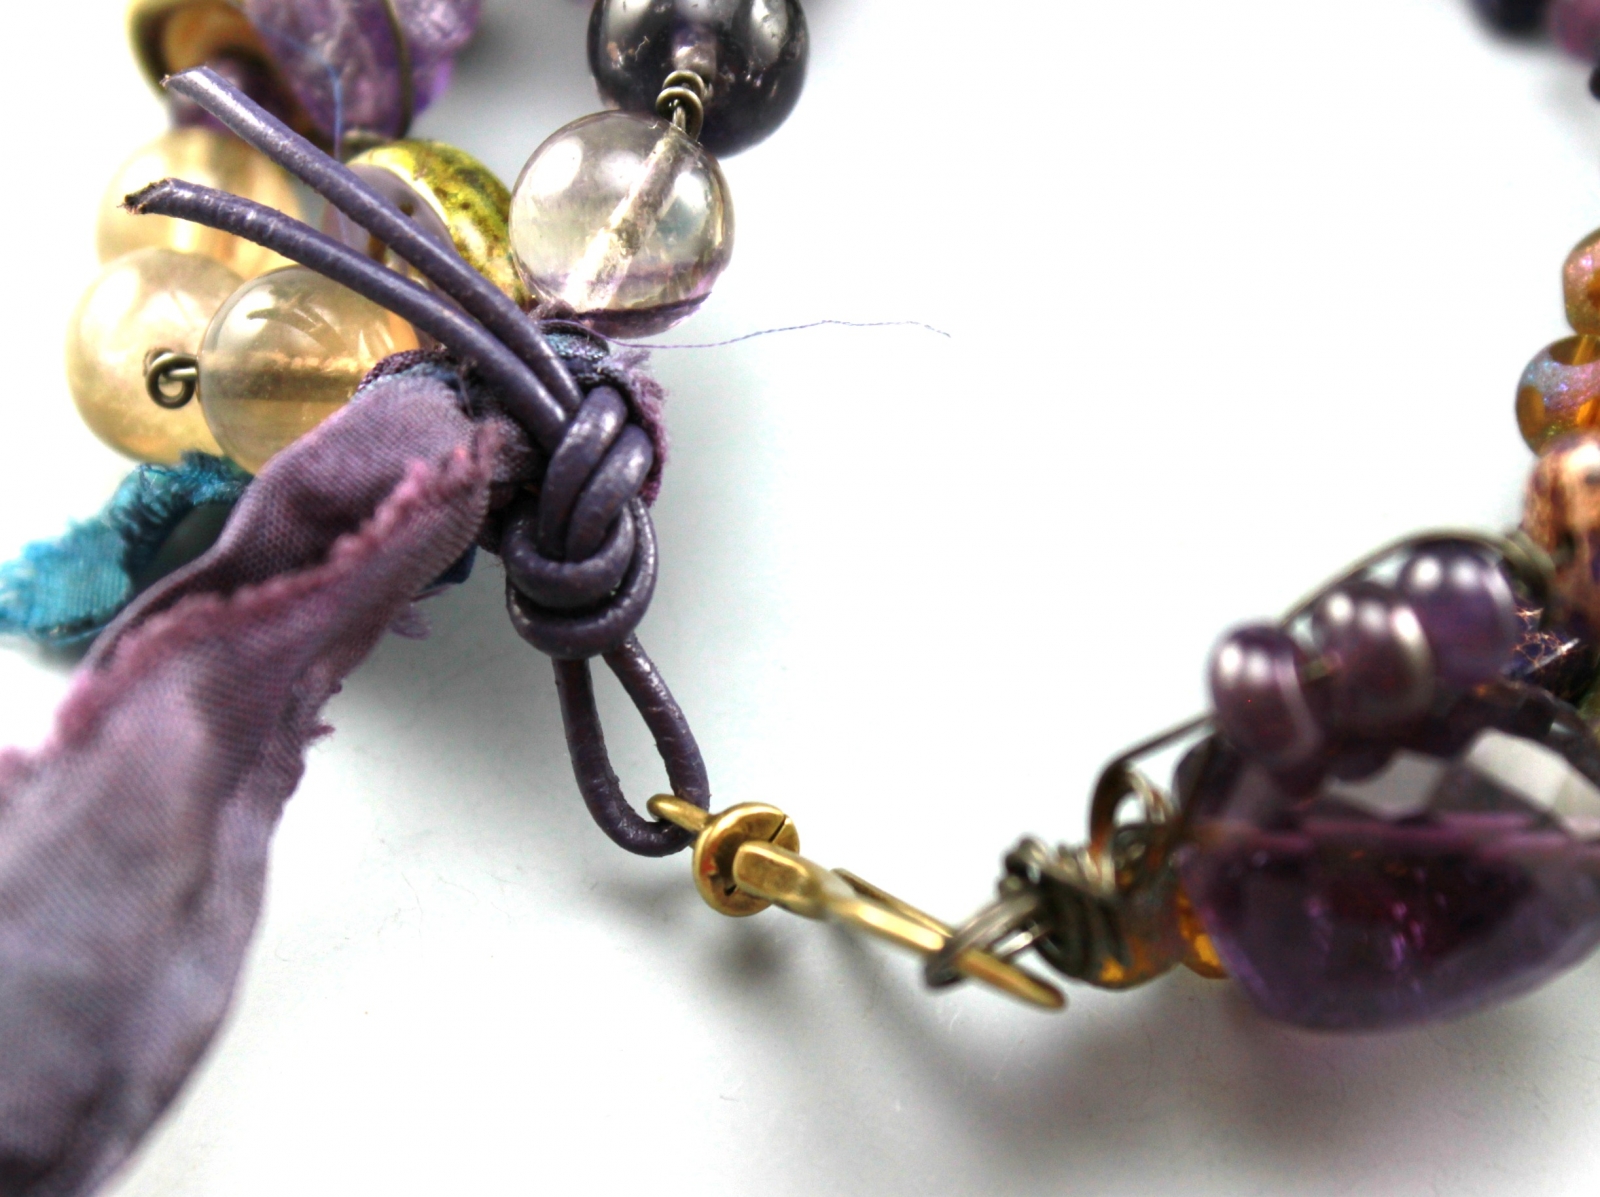
Position the eye of the hook closure in the center of the remaining 7 inches of leather cord.
Pull the loose ends of the cord through the wire loop you just made. Fold the two ends of leather cord and tie them back around to themselves making a knot and pull tightly. (After looking up this knot I think it is a Half Hitch Knot.) This allows you to fairly easily adjust the length later on if you want.
**Ribbon wrapped around the leather which holds the hook in place. This photo also shows the multiple strands of wire that were wrapped around the chain nose pliers to make a loop for the hook to go through and close the bracelet.
Wrap the ribbon several times around the wrapped wire under your loop. Tie a knot and position the ribbon ends to blend with the leather cord.
Final Touches
Using a soft rag dab some Renaissance Wax on the rag and rub it on all the exposed Black Annealed Steel Wire for each item. Do this in an open area as the wax is smelly. Let dry for an hour to overnight and lightly buff with a soft rag to create a light sheen or leave as a matte finish.
Enjoy your new jewelry design!!!
Chris
Chris Kaitlyn lives in the beautiful Pacific Northwest, Olympia, Washington, with her husband, where she creates her jewelry designs. To see more of Chris’s jewelry designs and what she is up to go to:
https://www.etsy.com/shop/ChrisKaitlynJewelry or http://www.pinterest.com/ChrisKaitlyn/ or https://www.facebook.com/ChrisKaitlynDesigns.
You are welcome to print out the photos and directions of the above design and then make your own in whatever color theme you would like. If you can not print from this page you are welcome to copy and past these directions to your own folder where you should be able to print them out. Enjoy!!!
Comments
Post new comment